
#Console Usage Guide
#Web Push
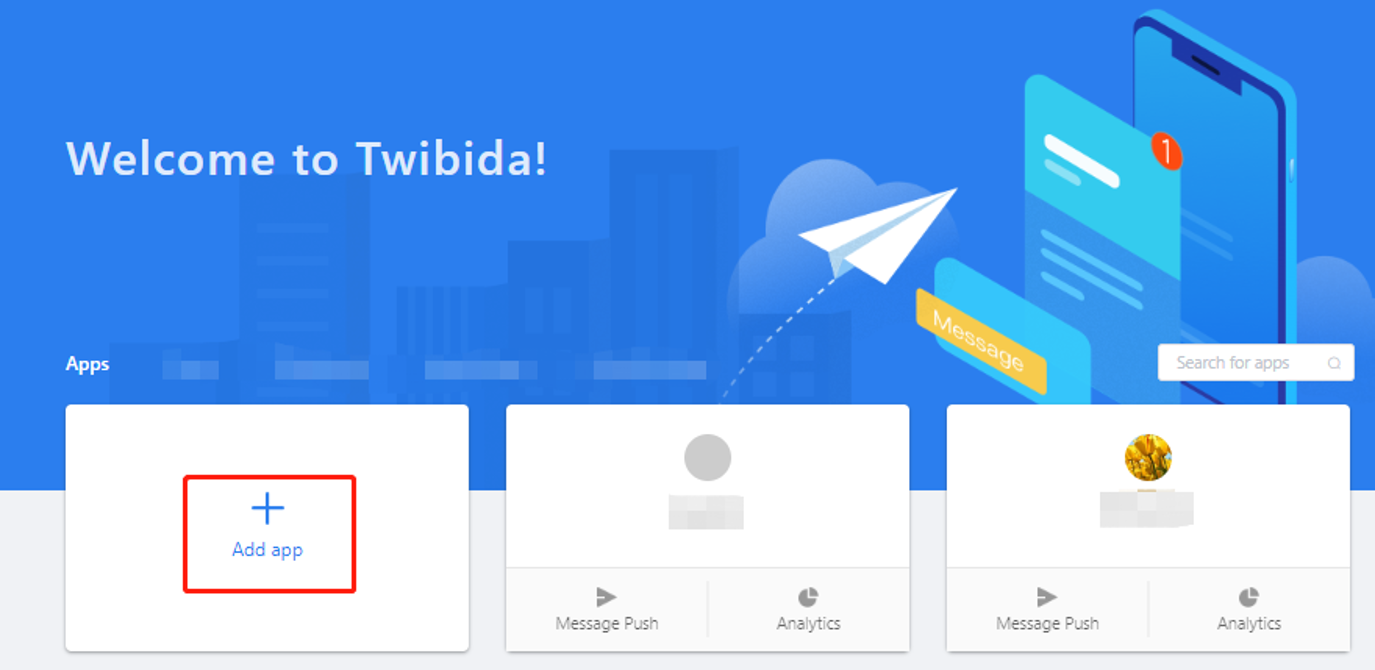
#Create an App
Step of creating an application:
Click the [Add app] button
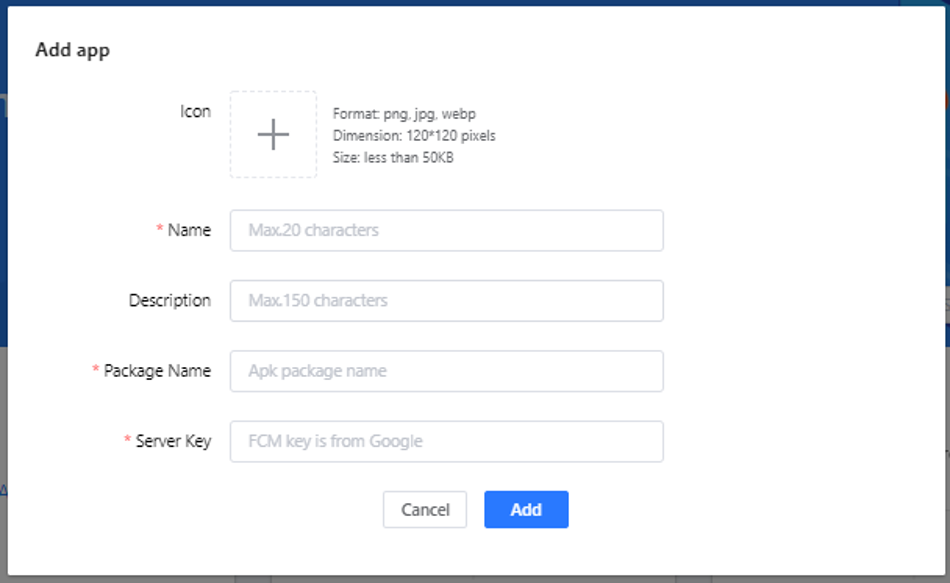
Configure app information:
Fill in the correct package name, app name and server key(Firebase).
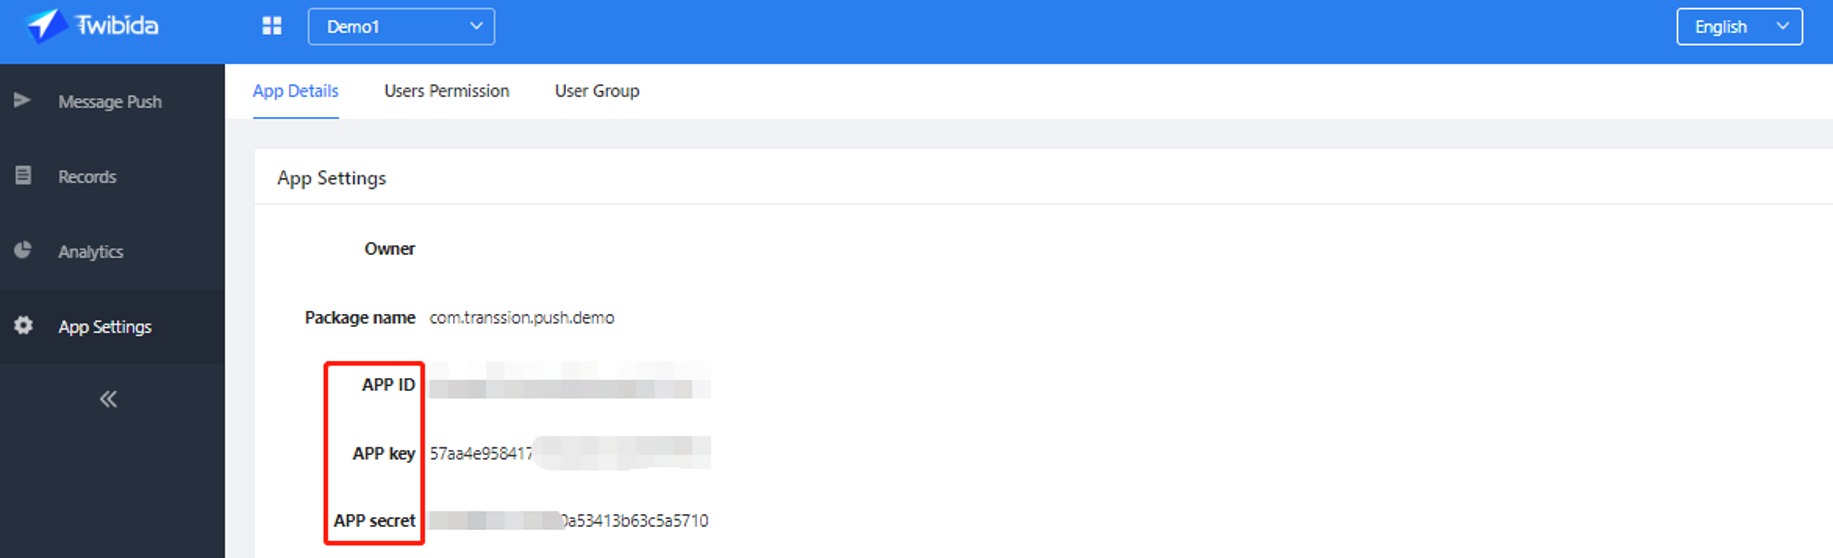
After the creation is complete, you can click on the app to enter the [App Settings]-[App details] to view the app information. And refer to the Android SDK Access Guide to complete the SDK access.
#App settings
The user who created the application is the [owner] of the application and has all the information viewing and operating permissions for the project. The owner can assign [Operation] and [Administrator] permissions in the permission configuration.
#User Group
User group is to combine the conditions of tag targeting, which is convenient for operations to directly select the created targeting combination when creating a message.
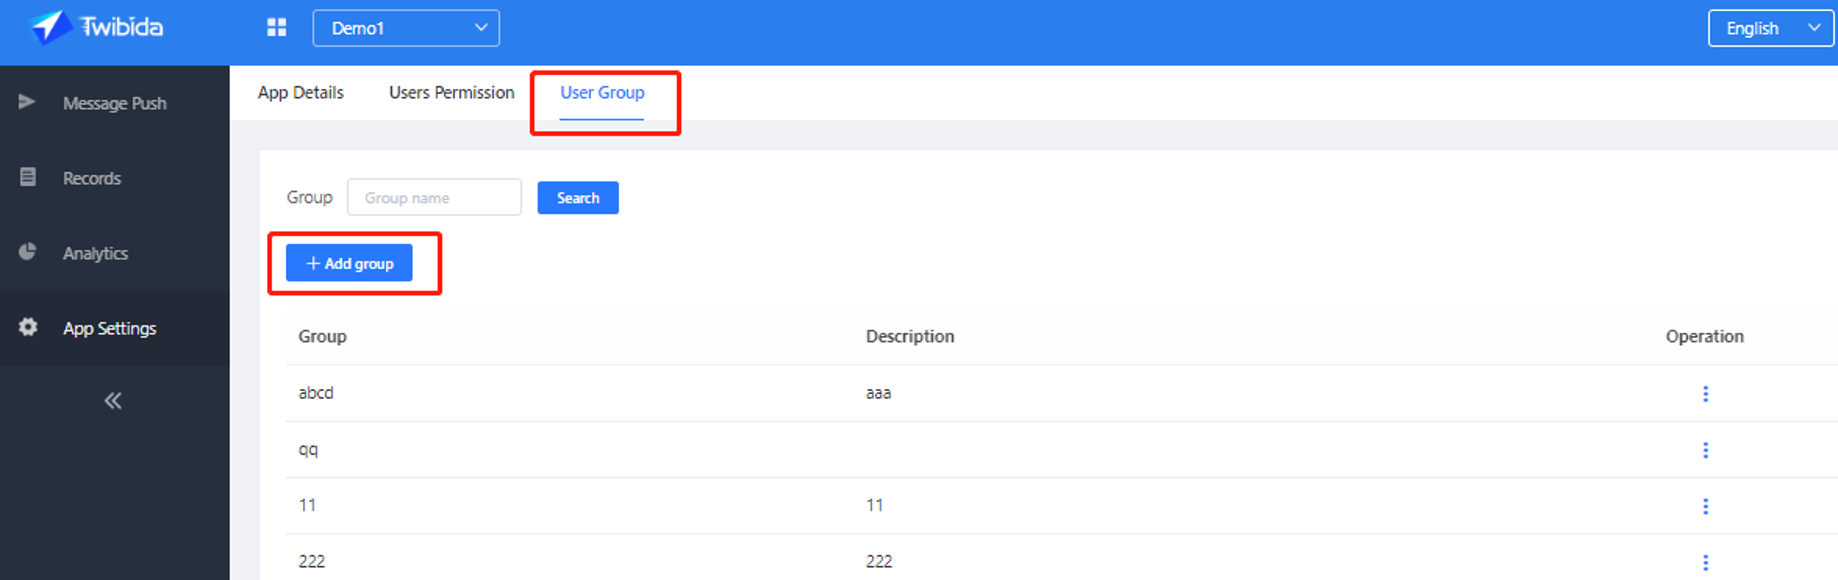
Add group
Click [Add Group], enter the user group name. For example, add a group of "African", select African countries and click [Confirm], the user group "Africa " has been created. At this time, in the message creation interface, select the "African " for the targeting-user group, that is directly select the targeting condition for this group.
#User permission
This page is the application owner (creator) permission. You can add users and set the users to [Administrator][operation] [Test] permissions.
Note: The following are permissions assignments.
| Page | Permission | Tester | Operator | Manager | Owner | |
|---|---|---|---|---|---|---|
| Home | App list | View apps | yes | yes | yes | yes |
| App | Message push | All | no | yes | yes | yes |
| Targeting | no | yes | yes | yes | ||
| Records | View data | Tester can only see his own push records | ||||
| Analytics | View app data | np | yes | yes | yes | |
| Material | All | no | yes | yes | yes | |
| App settings | App details | no | no | no | yes | |
| User permissions | no | no | no | yes | ||
| User group | no | no | yes | yes | ||
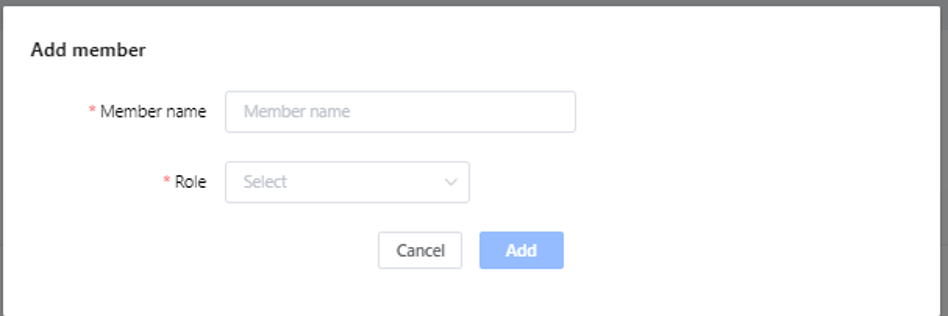
Add member
Click [Add Member], enter the user email and select the role and click [Add] to complete the operation. Unregistered users can register by checking the email and clicking the link.
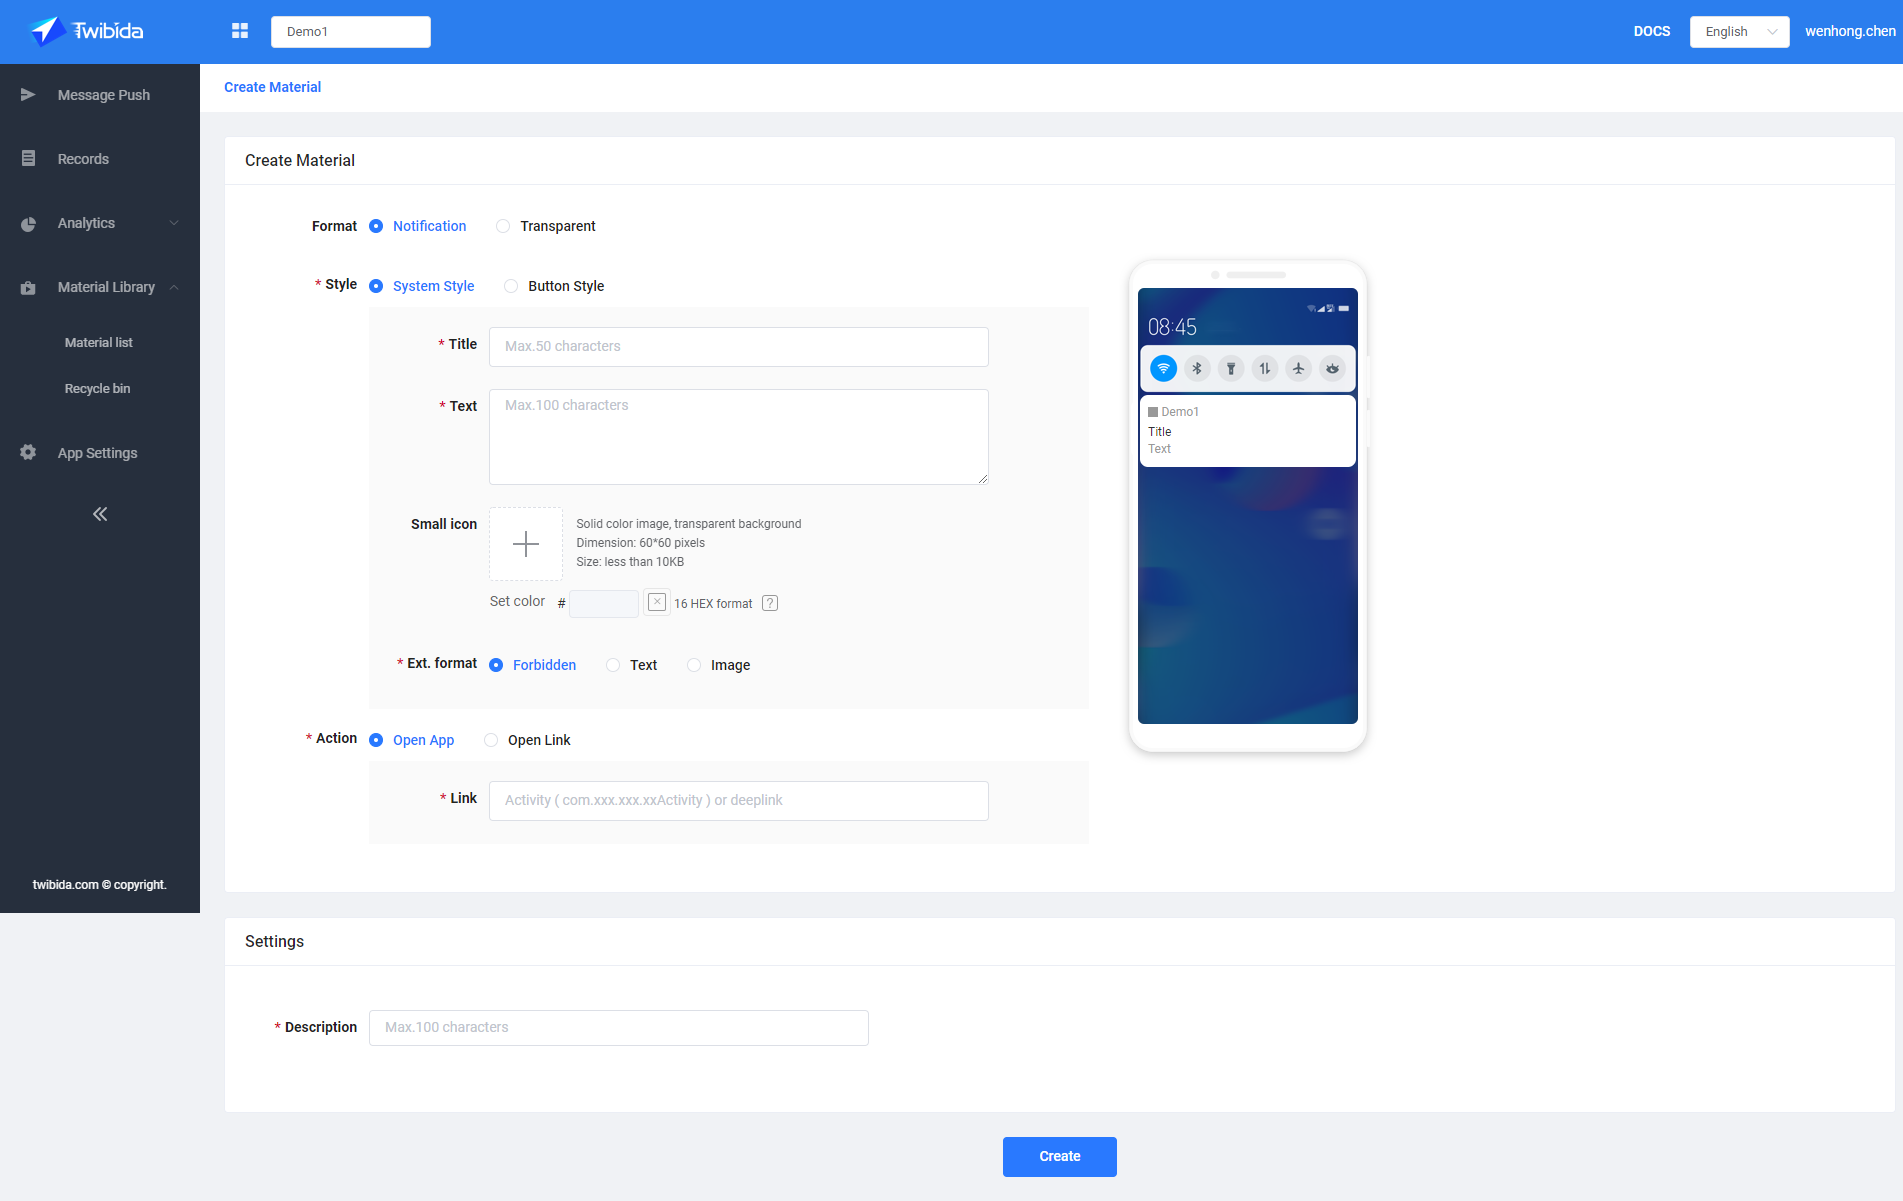
#Message push
#Push notifacation
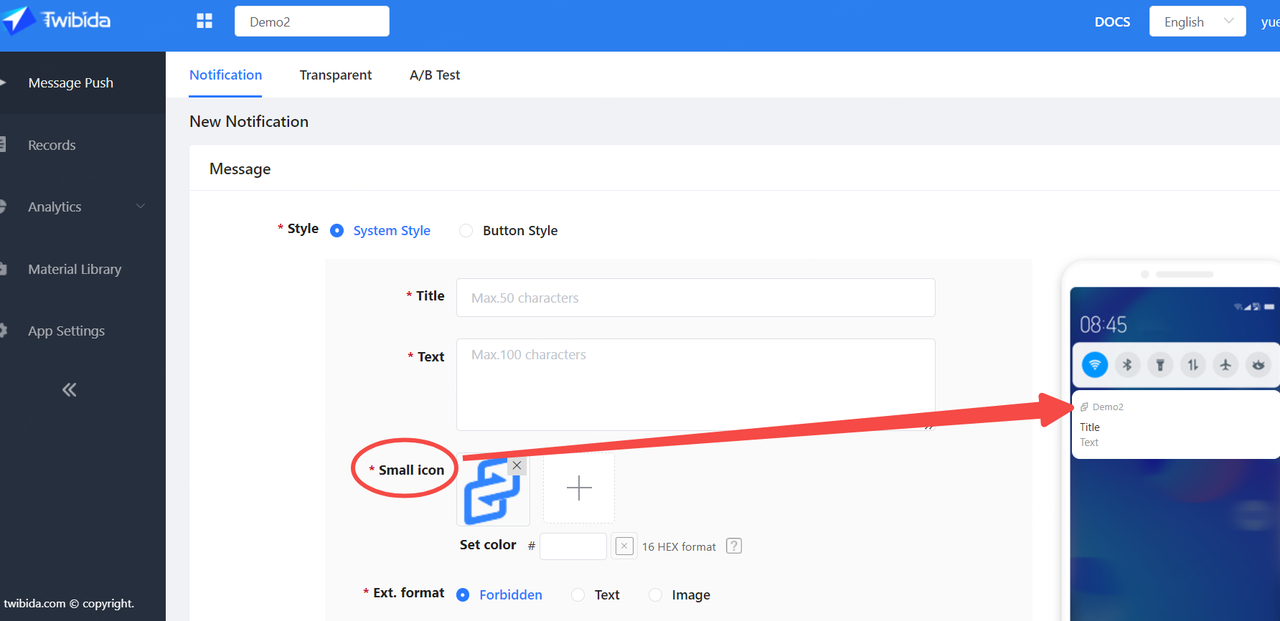
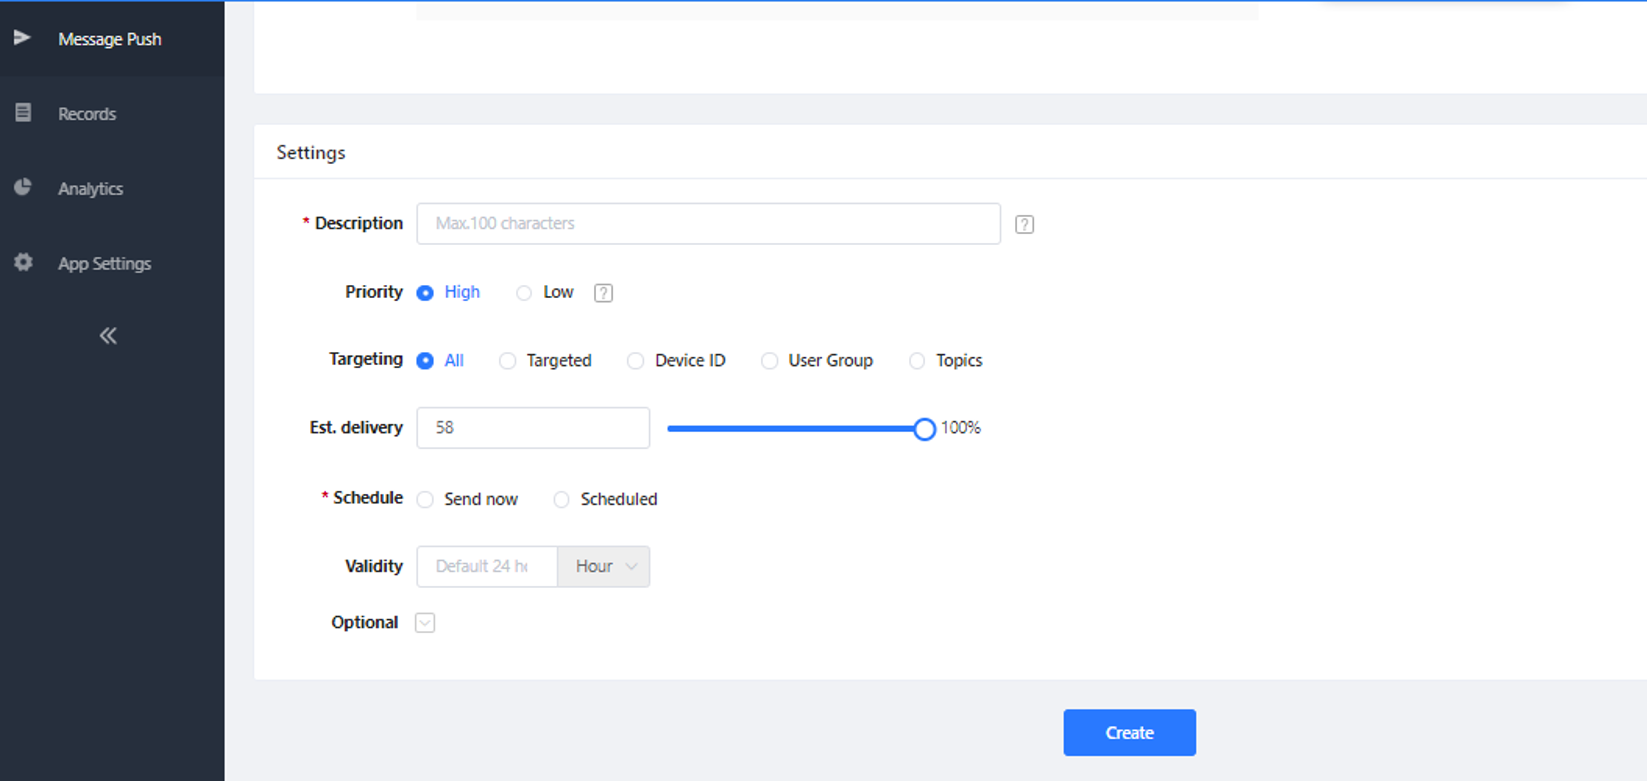
Select the application, push the message-push notification, select the system default style / button style, fill in the push content and click the [Create] button at the bottom of the page to enter the message preview.
[Small icon] is the small icon in front of the application name.
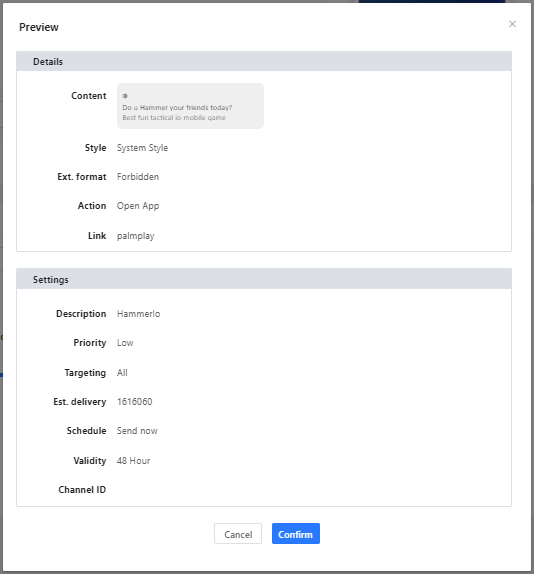
#Message preview
After the message is created, it will first enter the preview interface to review the push content for the last time.
After the push is completed, jump to the push records to view the push data.
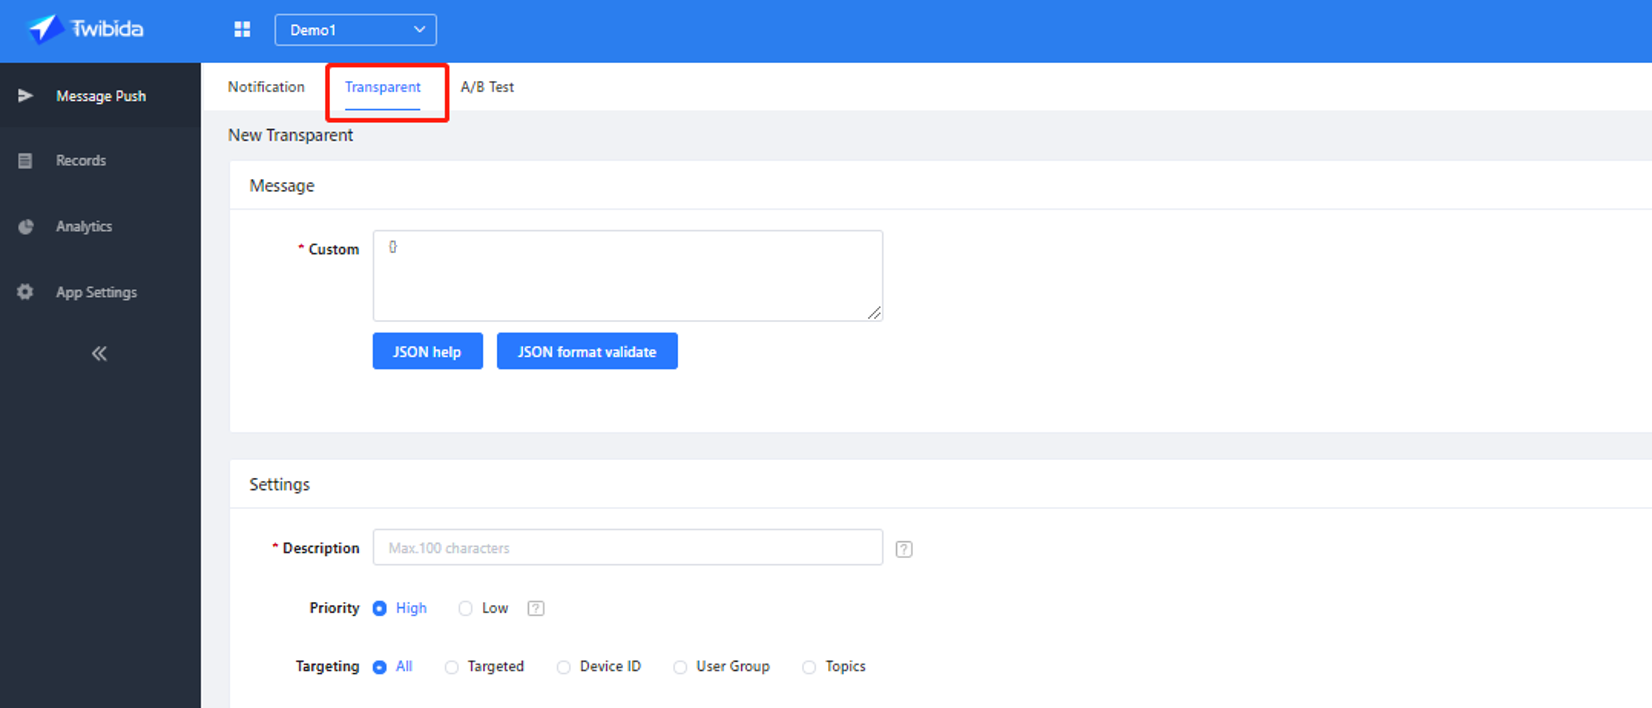
#Transparent
Transparent transmission is that developers can send custom message content to APP. For the operation steps, refer to Push Notification.
#Records
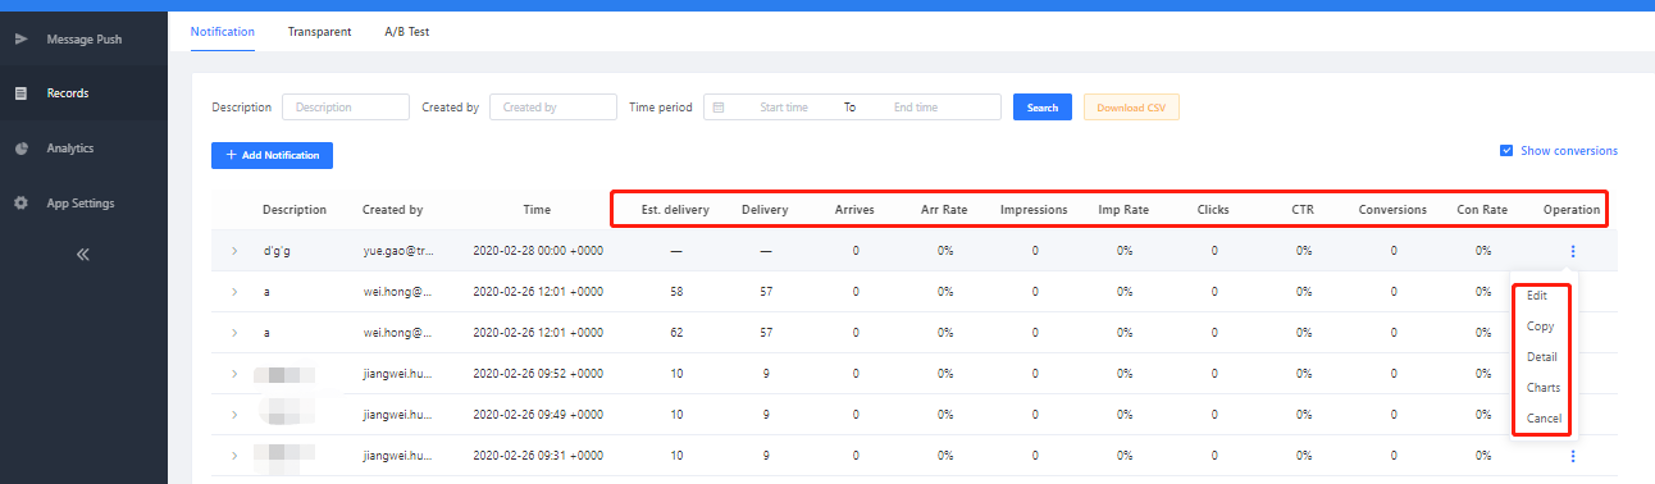
The message record presents details and statistics of all instant or timed messages that have been created.
About operation:
[Cancel] send:Before the timing message occurs, click [Cancel] in the record to cancel sending.
[Copy] Click Copy to return to the message creation interface. The content is copied to this record, which can be edited and then sent.
[Edit] It is possible to modify and save the content before the timing message occurs.
[Pause sending] Before the message is sent, if it is found that the content of the message is incorrect or other scenarios where the sending needs to be paused. After a pause, you can continue sending before the message is valid.
[Continue sending] After the push message is paused, you can continue to send it before the message expires.
[Withdraw] Message withdrawal is to withdraw the displayed (not clicked) message within the validity period of the message, and stop sending when the message is not sent. This function needs to upgrade SDK to 1.1.6.06 and higher.
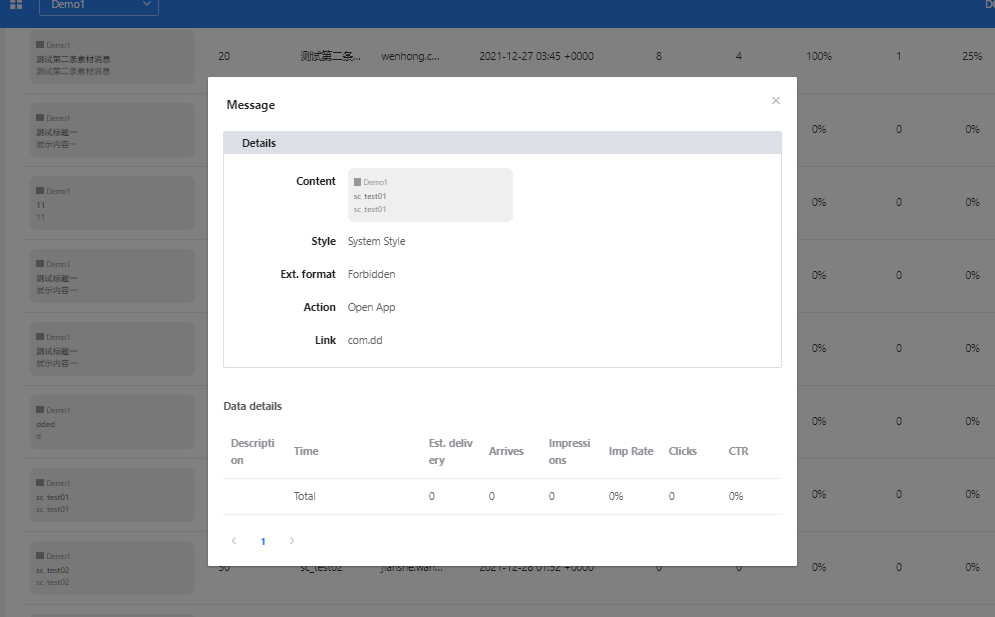
Est.delivery:Target users (installed minus known uninstalls minus 3 months of inactivity minus silent users)
Delivery:The actual number of users successfully delivered (the number of successful releases returned by firebase (the reason for the unsuccessful delivery: the token is invalid))
Arrives: Number of messages successfully pushed to users' phones
Arrival rate: The proportion of messages arriving at the user to the total effective amount (arrivals / pushes)
Impressions: The number of messages successfully displayed in the notification bar after the user's mobile phone received the message
Imp rate: Impressions / Arrives
Clicks: The number of user clicks after the message was displayed in the system notification bar
CTR: Clicks / Impressions
Conversions: Conversion events are customized by the app. Conversions show how many aspects of the marketing campaign (e.g., campaigns, ad networks, creatives) brought in conversion events and purchases, and how much revenue and lifecycle value, etc.
Conversion rate: Conversions / clicks
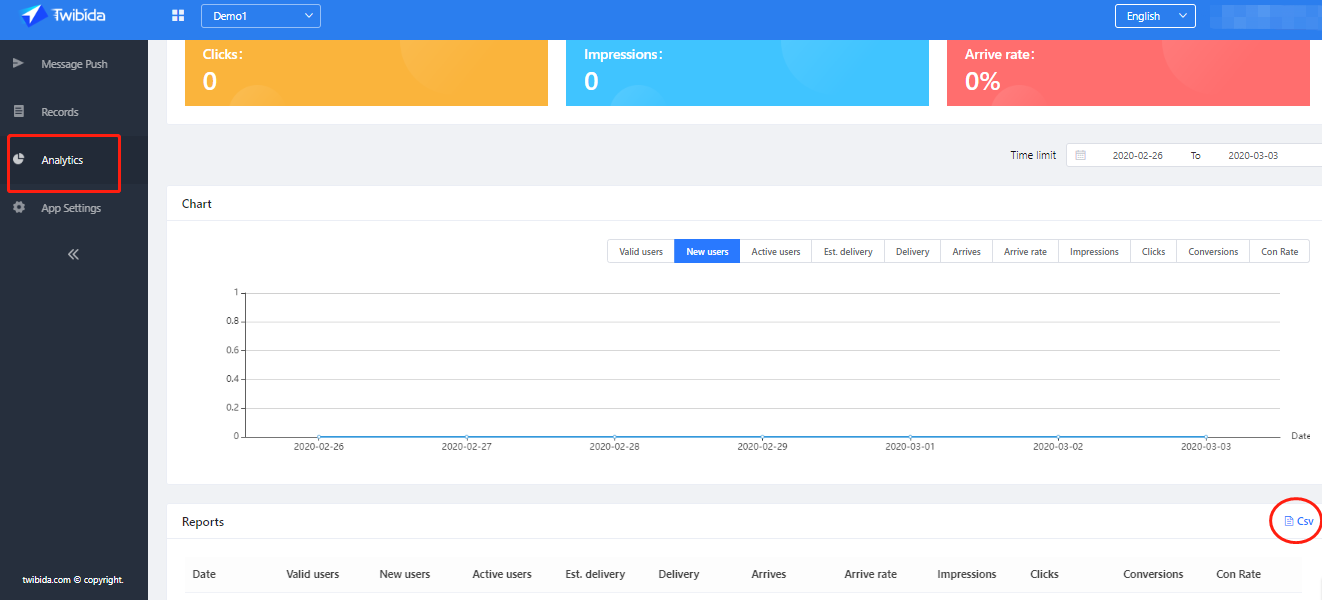
#Analytics
Analytics show the number of pushes and user-related data. You can view data statistics within one year and support export reports.
New users refers to the new application users who have HiPush service. When the app starts for the first time, the HiPush SDK initiates an internal registration with HiPush.
Active users refers to the total number of active users who open the process at least once in the statistical time.
Valid users: refers to users who have installed the app, remove users who have been uninstalled, and remove users who have not been active for three months.
#Material Library
The material library is divided into two pages: "Material List" and "Recycle Bin". All the materials uploaded by the user will be directly added to the material library, and the operater and above permissions can be directly viewed and used;
When the material is no longer used and other users are prevented from using it, the material can be moved to the recycle bin, and the material in the recycle bin cannot be selected when creating a plan.
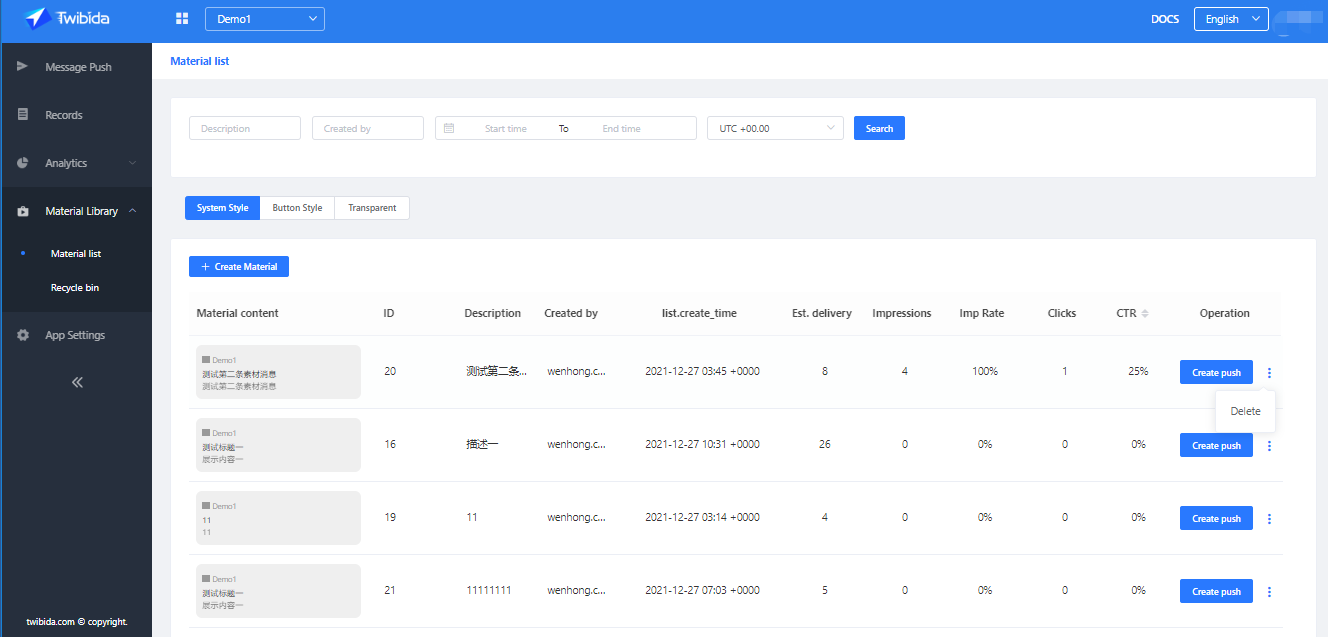
#Create Material
Click the [Create Material] button to enter the material creation page, fill in the material content, follow-up actions, and material description. After you click Create to complete the confirmation, the material is created successfully.
Note: After the material is created, the repetitiveness of the material will be monitored. If the content of a material is exactly the same, it will be regarded as a duplicate material that cannot be created.
#Material details display
Click the material style with the mouse to open the material details secondary page. The upper part displays the material content details, the lower part is the data record of the associated message of the material, and the first column is the total data.
#Material handling
[Delete]
After the material in the material library is deleted, the material is saved in the recycle bin. At this time, the historical material information can be copied, but the content of the material cannot be changed, and the material is associated.Delete permanently
[Restore]
After the recycle bin materials are restored, the materials return to the material list.
[Delete permanently]
Only the administrator and the owner can operate, and the material content and data will be permanently deleted after permanent deletion.